
Tokyo at night is basically a street-level light show, and this tour is built for capturing it with neon signs and long exposure techniques you can actually use. I like that you can shoot with either a camera or your smartphone, and the focus stays on what matters after dark, finding framing fast, then making the light look intentional. One thing to consider is that the walk moves at an evening pace, so if you hate being rushed or you lose your group, you could miss some of the better shots.
My other favorite part is the small group size and the hands-on coaching style, so you get feedback on what you’re doing, not just a lecture. I also like that the route goes beyond the obvious postcard views, adding spots like Omoide Yokocho Memory Lane for gritty textures and sign-heavy scenes. If you want the tour to feel extra slow and calm, you may find the timing tight, especially in crowded areas like Shibuya.
Key things to know before you go
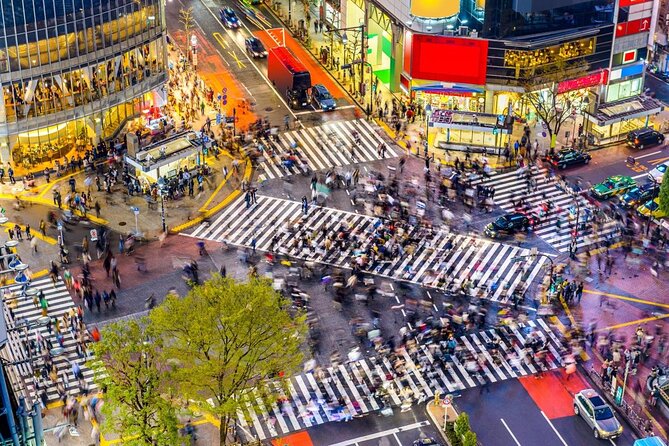
- Shinjuku to Shibuya after dark with a photo-first route, Kabukicho, Omoide Yokocho, then Shibuya Crossing
- Pro photography instruction that works for both phone cameras and traditional cameras
- Long exposure practice aimed at neon, crowds, and illuminated landmarks
- Max 4 travelers, so it stays hands-on instead of generic
- Shibuya Crossing timing built around watching a moving human grid of people
- Train transfer is on you, and bus fare is not included
Tokyo neon, street photos, and what this tour is really good at
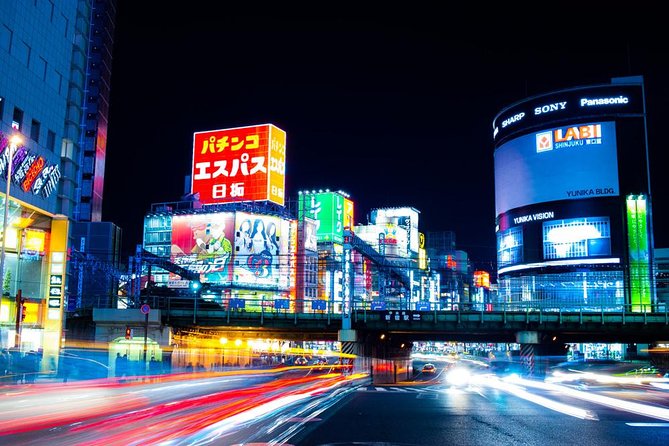
This is the kind of Tokyo night tour that makes sense even if you are not a photographer. You are walking through the city where the light does half the work for you, then learning how to control the rest. The big win is that the instruction is practical: you learn settings and framing ideas you can repeat the next night you head out alone.
You get two main “photo goals.” First, capture neon signs and lit landmarks without your images looking like random glare. Second, translate Tokyo’s nightlife energy into street photos, including candid-feeling moments and motion shots. If you are chasing that cinematic Tokyo look, this tour targets it directly, especially around the Shibuya Crossing area.
The route also helps you move between different photo styles in one evening. Shinjuku gives you dense signage and dramatic angles. Omoide Yokocho gives you smaller, moodier textures. Shibuya gives you scale, crowds, and the challenge of shooting people who will not stand still. That mix is what makes the time feel worth it, instead of just checking boxes.
Also on the shortlist for Tokyo:
- Mt Fuji and Hakone 1-Day Bus Tour Return by Bullet Train
★ 5.0 · 26,383 reviews - 1-Day Tokyo Bus Tour
★ 5.0 · 14,250 reviews - Tokyo: TOKYO SKYTREE® Admission ticket
★ 4.5 · 11,192 reviews
Meeting at Happy Lemon in Shinjuku, and what to bring
You start at Happy Lemon Keio Shinjuku Shop (1-chōme-1-4 Nishishinjuku, Shinjuku City, Tokyo 160-0023). The start time is 7:00 pm, and the tour ends in Shibuya near 2-chōme-2-1 Dōgenzaka (Tokyo 150-0043). You get a mobile ticket, so you do not need to hunt for paper vouchers.
Plan to arrive a little early. Shinjuku station and the surrounding streets can feel like a maze at night, and one common snag is simply finding the exact meetup point on the first try. If you show up with a few minutes of buffer, you avoid the stress that can throw off your first 30 minutes.
Bring the gear you have, but also bring the ability to experiment. If you are using a phone, you’ll still be able to practice night shooting techniques and adjustments. If you are using a camera, the most useful capability is the ability to control exposure, especially shutter speed, so you can handle long exposures. A tripod is not required based on the written details, but it can be helpful for stability in night scenes, and it came up as a good idea in the experience feedback.
Also, wear shoes you trust. The tour is short, around 3 hours total, and the pace can be quick when you are moving between photo stops.
Kabukicho after dark: neon signs, quick angles, and motion
Your first major stop is Kabukicho District, where you’ll spend about 1 hour. Kabukicho is famous for a reason. You get layers of signage, bright storefront lights, and streets full of visual “noise” that can become a strength if you frame it right. This is also where you can practice the kind of night street photography that looks like it belongs in a film, not a snapshot.
What I like about this portion is that it teaches you to see. A good guide doesn’t just point you at famous lights, they help you isolate what matters. The coaching style here matters, because Tokyo nights can trick your camera or phone into overexposing highlights. The guide feedback you’re likely to get is aimed at making neon look crisp and readable, not blown-out.
You’ll also be practicing technique that becomes your evening toolkit. Expect tips around composition and how to keep the background from swallowing your subject. If you’re shooting people, you’ll be learning how to handle crowds without turning everything into a blurry mess. If you’re aiming for long exposure effects, this is a great place to experiment while the light density is high.
Potential drawback: Kabukicho can be busy, and if you prefer a slow, wandering pace, the group may feel like it moves with purpose. One person had trouble keeping up and ended up separated, which is a reminder to stay close during transitions.
Omoide Yokocho Memory Lane: the small frames that make your set better
Next is Omoide Yokocho Memory Lane for about 30 minutes. This stop is valuable because it changes the texture of your photos. Instead of wide neon surfaces, you can focus on closer details: signs, dim corners, and that slightly gritty alley feeling that makes Tokyo look lived-in.
This is also where a hands-on guide helps you avoid a common problem. Many people arrive at a night market or alley lane, take a few decent shots, then leave with images that all look the same. Coaching here is often about making a series: one photo that sets the mood, one that shows a key sign, one that includes a human element without losing clarity.
If you are using a smartphone, this is a strong place to learn simple techniques. The best phone results often come from small changes like where you place the subject in the frame, how you manage contrast, and what you include or leave out. The experience includes guidance for phone camera shooting, including practical device-level tips, and that matters here because alley lanes punish sloppy framing.
The drawback is mostly timing. Thirty minutes is enough to get a usable batch, but not enough to treat it like your personal hangout. If you want to linger for hours, you’ll need to plan an extra solo visit later.
A change of pace from Tokyo:
- Tokyo: teamLab Planets TOKYO Digital Art Museum Entry Ticket
★ 4.6 · 9,779 reviews - Mt Fuji & Hakone Cruise, Drum Show Bullet Train 1 Day from Tokyo
★ 4.0 · 7,413 reviews - Tokyo: Sumo Show Experience with Chicken Hot Pot and a Photo
★ 4.8 · 6,678 reviews - Tokyo: Shinjuku Food Tour (13 Dishes at 4 Local Eateries)
★ 5.0 · 6,603 reviews
The Shinjuku to Shibuya train transfer, and shooting while you move
After Kabukicho, you head by train to Shibuya. The train is at your own expense, and the written information also notes that bus fare is not included. This part is not just logistics, it affects your photos.
During transfers, you lose the controlled “photo stop” rhythm and you’re back in city movement. That means you need to keep your eyes open for quick shots, but also stay aware of the group so you don’t miss the next instructions or meetup points.
One reason the small group format is helpful is that you can keep track of your exact path. With a max of 4 travelers, you’re not blending into a giant herd. Still, crowded stations can make it easy to get turned around, so keep your phone camera ready but your attention on the guide and group.
If you do not know the area well, this is where arriving a bit early on a training-free night helps. You can also take a quick screenshot of the meetup address for your own peace of mind.
Shibuya Crossing: long exposures, crowd energy, and that iconic moment
Your final focus is Shibuya Crossing, for about 45 minutes. This is the payoff scene. The intersection is famous because it moves like a living grid. You get the cinematic feel you hear people talk about, and you get the challenge: crowds that move, lights that reflect, and timing that decides whether your photo looks planned or chaotic.
Long exposure is the core skill to play with here. When you slow the shutter, the lights can turn into smooth streaks while people blur into a sense of motion. When you get the timing right, it looks like Tokyo is flowing through your lens instead of just standing there for the camera.
If you’re newer to night photography, this is one of the best places to learn because you can test quickly. Take a shot, adjust one setting, try again, and watch the image shift. That feedback loop is exactly what you want during a short tour.
You’ll also learn how to position yourself. A good guide doesn’t just say “stand here,” they help you choose angles that include the right mix of street, signage, and pedestrian motion. In crowded places, saving time by knowing where to stand matters.
Small caution: Shibuya Crossing is busy. If you have a tendency to drift for photos, it’s worth staying close. One negative experience reported getting separated after a fast-walking pace, and you do not want that to happen at your final stop.
Photo tips you’ll actually use later (phones and cameras)
The best part of a street photo tour is not the locations, it’s what you carry home. This tour is designed to teach you camera settings and street photography technique in a way that works even if you start at zero.
Here’s what you’ll likely practice during the evening:
- Exposure control for neon so lights do not explode into white blobs
- Composition ideas for cleaner frames, especially in busy streets
- Long exposure timing for motion, crowd flow, and light streaks
- Phone camera adjustments you can repeat without needing a “pro” camera
One thing that comes through in the coaching style is patience. Guides like Charles and Lukasz are described as attentive and helpful with settings, including guiding people who only shoot on mobiles. There’s also a workshop-style approach used by some guides, with demonstration first, then time to practice right away. That structure helps you stop guessing and start making images intentionally.
If you want to get the most from the tour, do this mental checklist before each stop:
1) Decide what the photo is about, neon signs, alley texture, or crowd motion.
2) Watch the frame before you shoot. Move your feet, then press the shutter.
3) Take a quick test shot and adjust one thing, shutter speed or exposure, then shoot again.
You’re not expected to master everything in one night. But if you leave knowing the basics of how to control light, you’ll improve quickly after you return to your hotel.
Price, group size, and value for your money
At $184.99 per group for up to 2, the pricing is built for pairs. If you’re traveling solo, you’re still paying for that group setup, so you want to be confident you’ll use the instruction. If you’re traveling as two people who want better night photos without trial and error for hours, the value can be strong.
Here’s why the price can feel fair:
- You get a pro photography instructor focused on teaching, not just leading
- The tour covers high-impact night areas, Shinjuku and Shibuya
- You get a small group size that supports feedback and safety
- It’s short enough to stay energetic, around 3 hours at night
Is it overpriced for someone who only wants a quick walk to famous spots? Maybe. The reviews and the format emphasize that this is a photography-focused experience. If you’re more interested in nightlife sightseeing than learning photo technique, you might feel like you want more free roaming time.
Also, remember the train portion is not included in the written cost details. You might have extra local transit spending for that transfer, so keep a little cash or card buffer.
Who should book this Tokyo cyberpunk photo tour
This tour is a great fit if:
- You want night street photos but do not want to figure out camera settings from scratch
- You shoot with a smartphone or camera and want guidance that fits your gear
- You want iconic Tokyo energy with real instruction, not just a checklist of photo spots
- You like being guided to good angles, so you spend less time wandering aimlessly
It’s less ideal if:
- You hate group movement and want long, slow stops
- You need complete control of pacing and do not like being part of a schedule
- You’re likely to get separated in crowded transit areas unless you stick very close
If you are a first-time visitor, this can also help you get oriented fast. You’ll see key districts after dark and learn how to photograph them, which makes the next nights of your trip much easier.
Should you book it? My practical take
I’d book this if your goal is better night photos with less guesswork. The route is tightly planned for neon, crowds, and contrast-heavy scenes, and the instruction is geared toward making your images look intentional. With a max group size of 4, you have a realistic chance of getting feedback on what you’re doing, whether that’s a camera or your phone.
I would hesitate if you hate being rushed, because evening pacing matters and crowded stops like Shibuya can feel intense. Also, if you need a super flexible schedule or you expect long free time at each location, this format may feel short.
If you go in expecting a structured photo workshop through Tokyo’s neon lanes, you’ll likely leave with images you’re proud to share, and skills you can use the next time you chase night lights on your own.
FAQ
What is the duration of the Tokyo Cyberpunk Street Photo Tour?
It lasts about 3 hours (approximately).
How much does the tour cost?
The price is $184.99 per group, up to 2 people.
What is included in the price?
A professional photography instructor is included.
What is not included?
Bus fare is not included. You also travel to Shibuya by train at your own expense.
What neighborhoods and landmarks will we photograph?
You’ll focus on Kabukicho District, Omoide Yokocho Memory Lane, and end at Shibuya Crossing.
Do I need a camera, or can I use a smartphone?
You can use a camera or your smartphone. The tour supports both.
Where does the tour start and end?
It starts at Happy Lemon Keio Shinjuku Shop (1-chōme-1-4 Nishishinjuku, Shinjuku City, Tokyo 160-0023) and ends near 2-chōme-2-1 Dōgenzaka, Shibuya, Tokyo 150-0043.
What time does the tour start?
Start time is 7:00 pm.
How big is the group?
The maximum group size is 4 travelers.
What happens if the weather is bad?
The experience requires good weather. If it is canceled due to poor weather, you’ll be offered a different date or a full refund.
Latest write-ups near Tokyo
- Tokyo Customized Private Tour: See Top Attractions in 1 Day★ 4.8 · 67 reviews
- From Tokyo: Top 5 Scenic Spots of Mount Fuji Full-Day Tour★ 4.5 · 67 reviews
- Tokyo: Shinjuku Izakaya and Golden Gai Bar Hopping Tour (2h)★ 4.9 · 67 reviews
- Traditional Japanese Music ZAKURO SHOW in Tokyo★ 5.0 · 67 reviews
- Tsukiji: Unlimited Sake Tasting Experience★ 4.9 · 67 reviews
- Samurai Ninja Museum Asakusa: Kid-Friendly Ninja Training★ 4.7 · 67 reviews
- Tokyo: Not a show- a professional sumo practice with experts★ 4.9 · 67 reviews
- Private Harajuku Omotesando Architecture Walking Tour★ 5.0 · 67 reviews
Photography Sessions, compared.
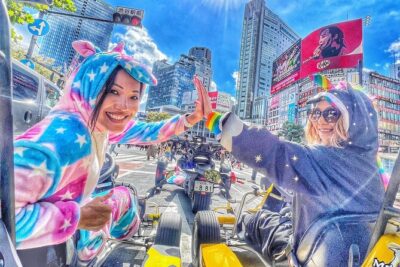
Best Go Kart Experience in Shibuya Crossing with Iconic Photos
Read our review →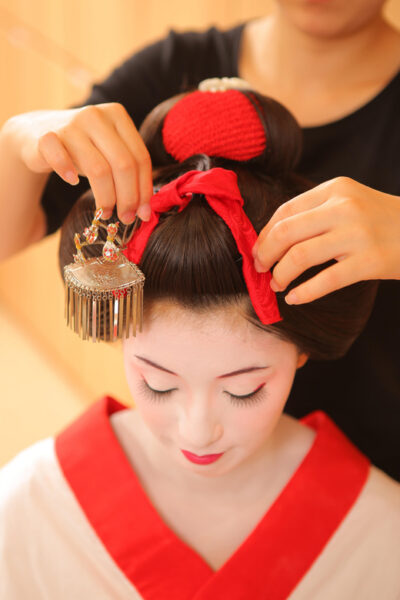
Tokyo Go-Karting Experience: Shibuya Crossing with Photos
Read our review →
Tokyo by Night Photography Tour (Private Option Available)
Read our review →
![[Okinawa Blue Cave] Snorkeling with Private Guide+ Free Photos](https://f1.japantourreviews.com/wp-content/uploads/okinawa-blue-cave-snorkeling-with-private-guide-free-photos-400x267.jpg)
[Okinawa Blue Cave] Snorkeling with Private Guide+ Free Photos
Read our review →
Your Private Vacation Photography Session In Kyoto
Read our review →Browse the lists this tour appears in